Hectare.app allows for exporting recordings as GPX files.
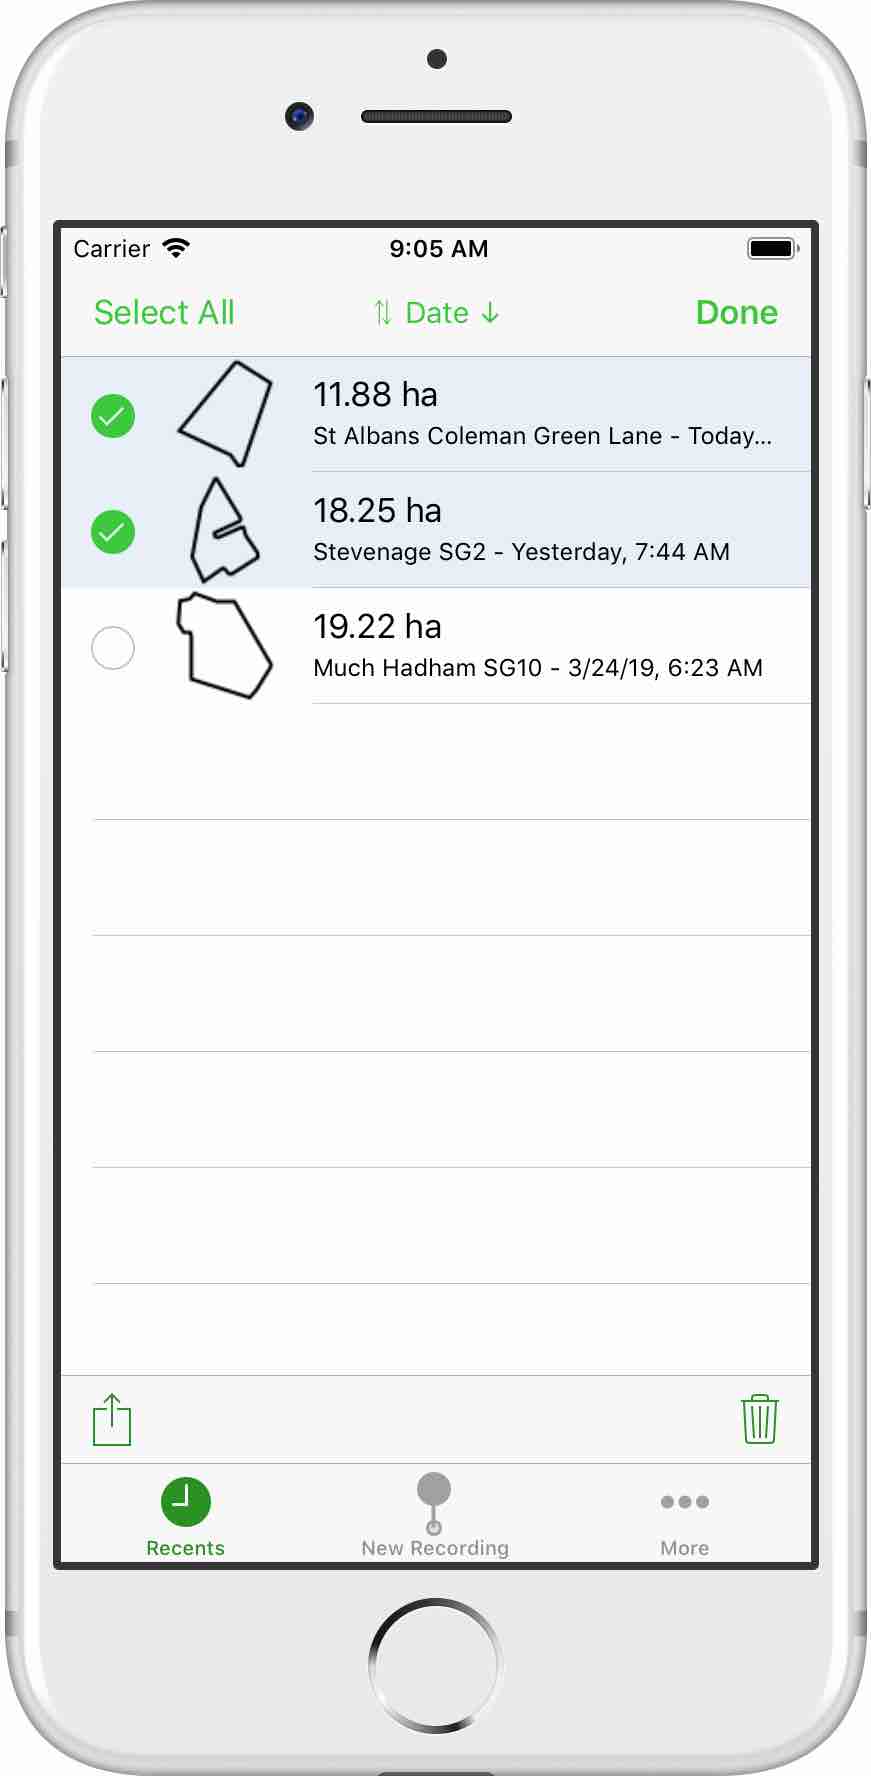
The Recent Recordings show a list of all Recordings. It is possible to export directly from this list.
To export a single recording, the recording can be swiped to the left. A menu will appear on the right hand side of the recording. This menu will include a button to export the recording.
To export multiple recordings, the list has to be changed to edit mode. The edit mode can be activated by tapping the “choose” "button in the upper right corner of the recordings list.
Once the list is in edit mode multiple recordings can be selected. Their selection status is indiced by a checkbox on the left hand side of the recording. The recordings can be tapped in order to change their selection state. Tapping a recording while the list is in edit mode will not show the details of the recording.
To export the selected recordings the export button has to be tapped that appears at the bottom of the list while the list is in edit mode.
To end the edit mode the button in the upper right corner needs to be tapped again.
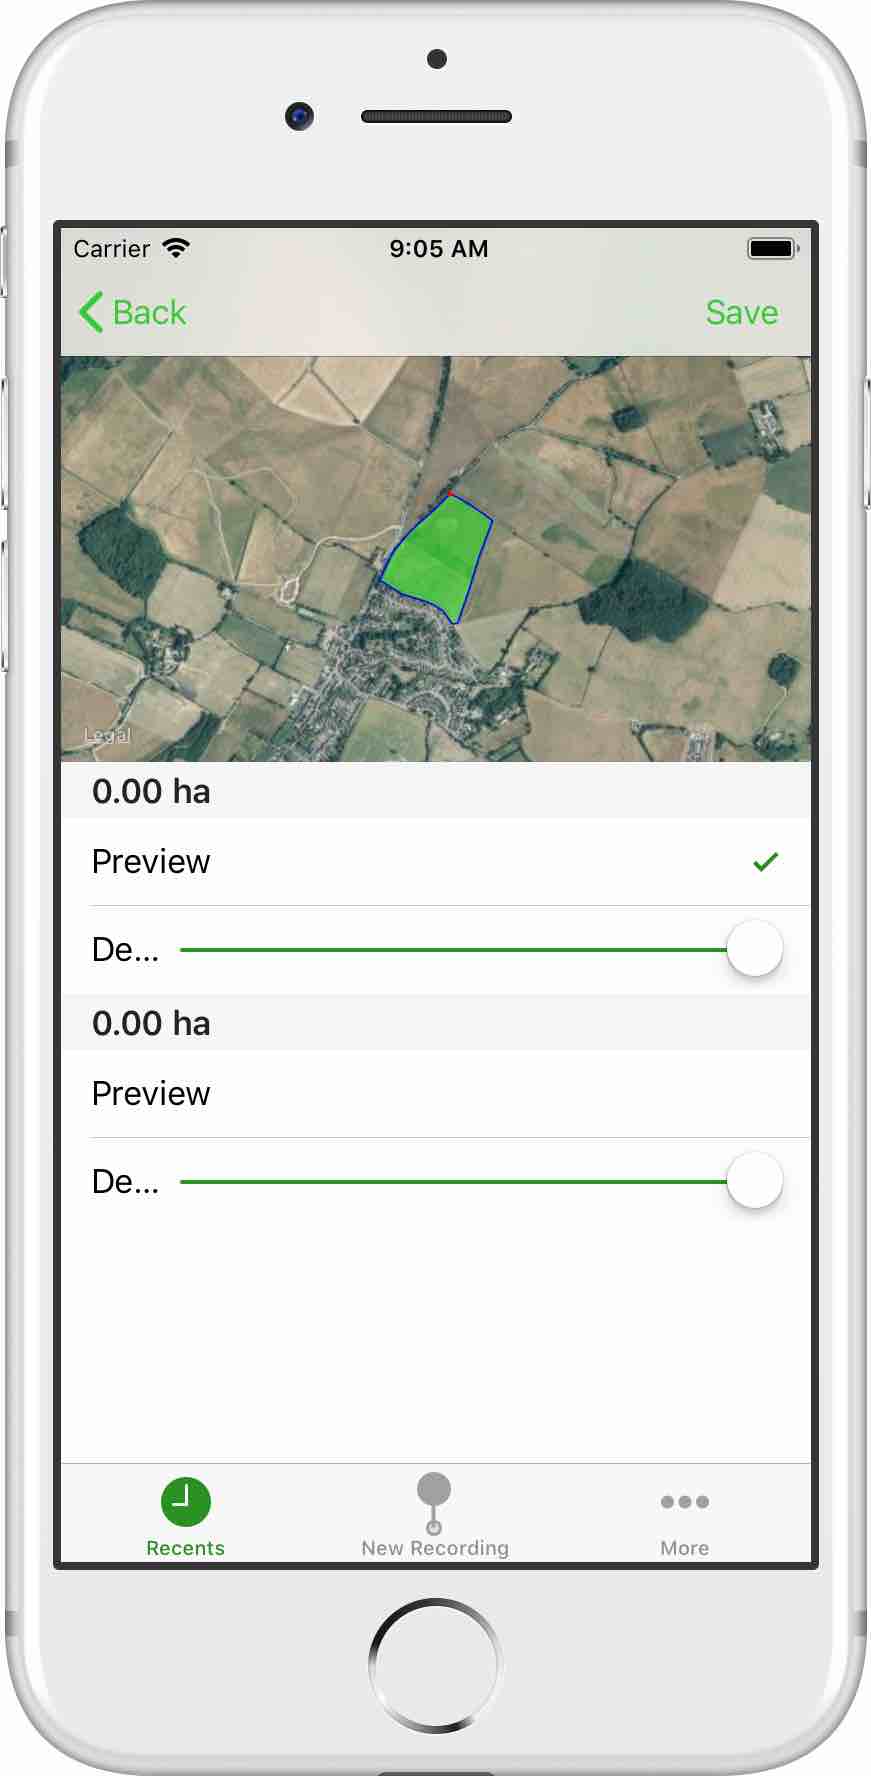
If the details of a recording are inspected it is possible to export the recording using the “Export” row at the bottom of the details table.
After the export was started a dialog appears listing the selected recordings and providing means to configure the detail level of each recording. The detail level defines how many points are exported for a recording. The more points are exported, the higher the details. Depending on the requirements for the exported file it might be useful to export at a lower detail level.
Once the export is started using the “Save” button in the top right corner, the system’s standard dialog appears asking how to proceed with the export.
There are three possibile kinds of destinations: AirDrop, other applications (like Messages or Mail) or file storages (like iCloud Drive or Dropbox). Each of the different kinds appears in a separate row starting at the top with AirDrop and ending at the bottom with the file storages.
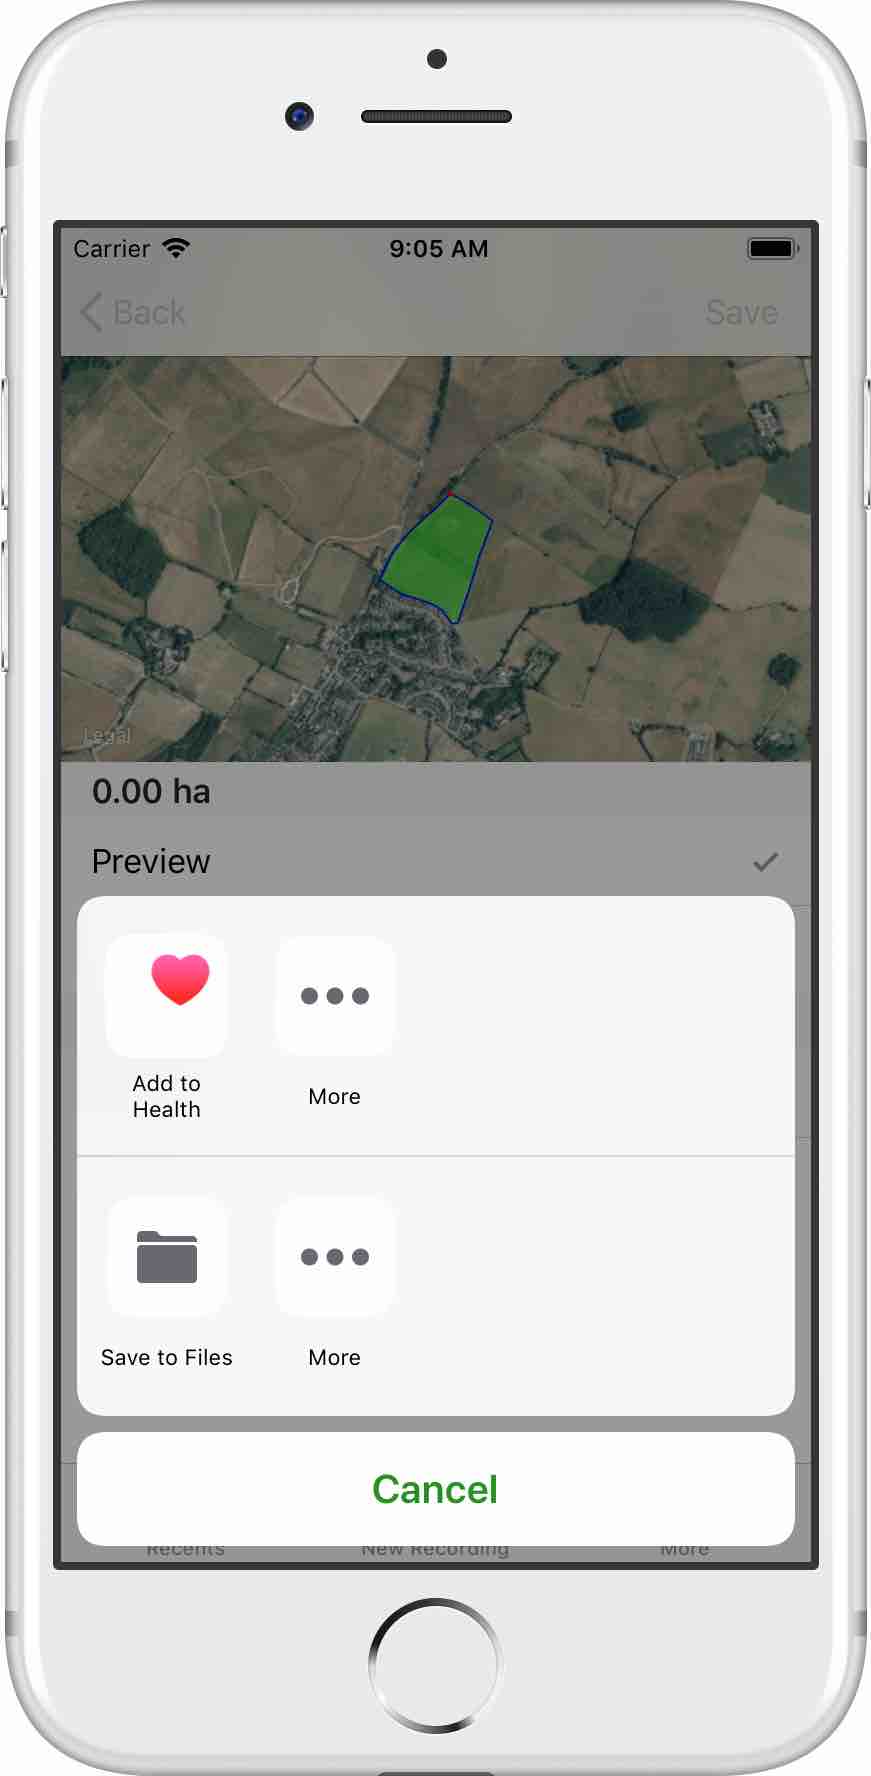
To export using AirDrop the receiving device needs to be activated in order to receive files via AirDrop. If the receiving device is in standby the device will not appear as receiver.
To export using an application it is sufficient to tap the corresponding app in the dialog.
To export using a file storage the corresponding button needs to be tapped. The following steps can vary for different file storages. Typically it is possible to select the folder where the export should be stored.